
Craftsman Mower Manual: A Comprehensive Guide
Navigating Craftsman mower ownership requires understanding model and serial numbers, crucial for parts, maintenance, and troubleshooting. This guide deciphers both Julian and calendar date systems.
Understanding Craftsman Mower Model and Serial Numbers
Craftsman mower model and serial numbers are essential keys to unlocking a wealth of information about your machine. The model number identifies the specific design and features, while the serial number reveals its manufacturing date and production sequence. These numbers are vital when ordering replacement parts, accessing the correct owner’s manual, and diagnosing potential issues.
Locating these numbers is the first step. They are typically found on a decal or stamped plate affixed to the mower’s deck or frame. Understanding the serial number’s format – whether it utilizes the older Julian date system (917.255940) or the newer calendar date system (917.255970) – is crucial for determining the mower’s age and origin. Accurate identification ensures you receive the correct support and maintain your mower effectively.
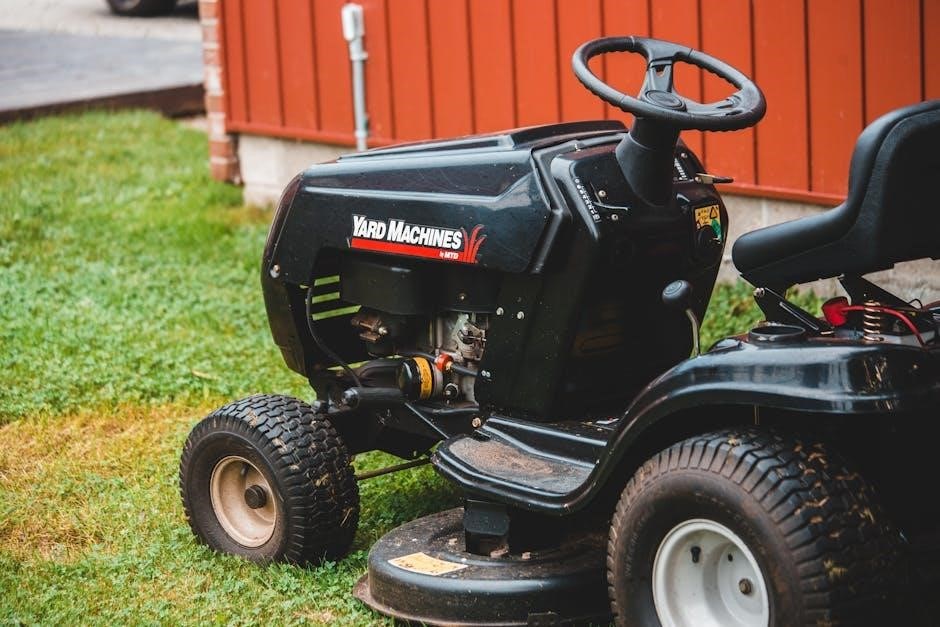
Locating the Model and Serial Number Plate
Finding the model and serial number plate on your Craftsman mower is the crucial first step for maintenance and repairs. Typically, this plate is affixed to the mower deck, often underneath, or on the rear frame. A flashlight and potentially a magnifying glass can be incredibly helpful, especially if the plate is obscured by debris or rust.
Look closely around the engine area and along the sides of the deck. Sometimes, the plate is positioned near the operator’s controls. It’s a small metal or plastic tag containing stamped or printed information. Be patient and methodical in your search; the location can vary slightly depending on the mower model. Once located, carefully record both the model and serial numbers for future reference.
Decoding the Old Julian Date System
Craftsman mowers manufactured before 1993 often utilize the Julian date system, represented by a format like 917.255940. The ‘917’ indicates the manufacturing source, while ‘255940’ holds the date information. Decoding this requires understanding its components. The first three digits of the latter number (e.g., 232) represent the day of the year – the 232nd day.
The following digit, often ‘1’, signifies the last digit of the manufacturing year. The ‘S’ plat code indicates the assembly plant. Finally, the remaining numbers (e.g., 01158) represent the unit’s sequential production number. This system allows pinpointing the approximate manufacturing date of older Craftsman mowers.
Understanding the 917.255940 Format
The 917.255940 format is central to deciphering the manufacturing date of older Craftsman mowers employing the Julian date system. The ‘917’ portion consistently denotes the manufacturing source or plant responsible for assembly. Crucially, the subsequent six-digit number, ‘255940’, encodes the specific date. This isn’t a standard date format; it requires breaking down into its constituent parts.
The initial three digits within ‘255940’ represent the day of the year – a numerical representation of the date within the calendar year. Following this is a single digit indicating the last digit of the year of manufacture. The ‘S’ plat code then identifies the specific assembly line. Finally, the remaining digits signify the sequential unit number produced on that line.
Interpreting the Day of Year Code (e.g., 232)
The day of year code, such as ‘232’, is a pivotal element in decoding the manufacture date using the older Julian date system. This number doesn’t represent a month and day; instead, it signifies the 232nd day of the calendar year. To translate this into a recognizable date, you’ll need a Julian date calendar or a conversion tool.
For instance, a code of ‘232’ corresponds to August 18th in a non-leap year (or August 19th in a leap year). Determining whether the year was a leap year is essential for accurate conversion. This system was utilized before the adoption of the more straightforward calendar date format in 1993, requiring careful interpretation to ascertain the mower’s production timeframe.
Decoding the ‘S’ Plat Code
The ‘S’ plat code, found within the serial number under the older Julian date system, represents the manufacturing plant where the mower was assembled. While the specific meaning of each letter isn’t universally documented, it identifies the origin of the unit. This code is crucial for tracing potential manufacturing defects or recalls specific to a particular facility.
Often appearing after the day of year code (e.g., 232S01158), the ‘S’ plat code helps pinpoint where the mower originated. Combined with the other serial number components, it provides a more complete picture of the mower’s history. Understanding this code, though sometimes obscure, aids in accurate parts ordering and service inquiries, ensuring compatibility and efficient repairs.

Decoding the New Calendar Date System (1993+)
Craftsman mowers manufactured after 1993 utilize a calendar date system for serial number encoding, offering a more straightforward method for determining the production date. This system, denoted by the 917.255970 format, clearly displays the month, day, and year of manufacture. For example, a serial number containing “012793A” indicates January 27, 1993, as the production date.
This system simplifies age determination compared to the older Julian date method. The final character, typically a letter like ‘A’, signifies the assembly line where the mower was built. Deciphering this code allows owners to accurately assess the mower’s age, aiding in maintenance scheduling and parts compatibility checks. It’s a vital component of understanding your Craftsman mower’s history.
Understanding the 917.255970 Format
The 917.255970 format is the key identifier for Craftsman mower serial numbers produced after 1993, employing a clear calendar date system. The “917” portion typically represents a source code, while “255970” denotes the model. Crucially, embedded within this sequence is the manufacturing date, presented as month, day, and year. For instance, encountering “012793A” within the serial number immediately reveals a production date of January 27, 1993.
This format contrasts sharply with the older Julian date system, offering a more intuitive understanding of the mower’s age. The trailing letter, such as ‘A’ in the example, indicates the specific assembly line responsible for its creation. Recognizing this format is fundamental to accurately dating your Craftsman mower and accessing appropriate support resources.
Interpreting Month, Day, and Year (e.g., 012793A)
Decoding the date portion of the serial number – like “012793A” – is straightforward. The first two digits represent the month (01 for January, 02 for February, and so on). Following this, the next two digits signify the day of the month (27 in our example, meaning the 27th). The subsequent two digits denote the year of manufacture (93 representing 1993).
Therefore, “012793A” definitively indicates the mower was assembled on January 27th, 1993. The final letter, ‘A’, pinpoints the specific assembly line where production occurred. This clear, calendar-based system simplifies determining the mower’s age compared to the older Julian date method. Accurate interpretation of these digits is vital for sourcing correct parts and maintenance schedules.
The Significance of the Assembly Line Code (‘A’)

The final character in the newer serial number format, such as the ‘A’ in “012793A”, designates the assembly line where the Craftsman mower was manufactured. While the specific meaning of each letter isn’t universally published, it provides valuable insight into the production origin. Different assembly lines might have utilized slightly varied components or employed unique quality control procedures.
This code isn’t typically crucial for routine maintenance or parts replacement. However, it can be helpful when addressing unusual issues or contacting Craftsman support, as it allows them to trace the mower’s production history more precisely. Knowing the assembly line can sometimes assist in identifying potential batch-specific problems or recalls. It’s a subtle detail offering a deeper understanding of the mower’s origins.
Using the Serial Number to Determine Mower Age
Determining your Craftsman mower’s age relies heavily on decoding its serial number. For models using the Julian date system (917.255940 format), the numbers preceding the ‘S’ plat code reveal the manufacturing date. For instance, “232” signifies the 232nd day of the year, and the final digit of the year.
With the newer calendar date system (917.255970 format), the date is directly represented as “MMDDYYA”. An example like “012793A” indicates January 27, 1993. Therefore, by accurately interpreting these codes, you can pinpoint the approximate manufacturing date of your mower, aiding in maintenance scheduling and parts compatibility checks. Remember to consider the system used by your mower’s serial number.
Example: Decoding Serial Number 031398
Let’s illustrate with the serial number 031398. This example, as noted in available resources, suggests a manufacturing date. While the exact system isn’t explicitly stated within the provided text, it implies a date-based interpretation. Assuming a standard month/day/year format, “03” could represent March, “13” the 13th day, and “98” the year 1998.

However, it’s crucial to remember that Craftsman utilized both Julian and calendar date systems. Without knowing which system applies, this interpretation remains tentative. Further investigation might be needed to confirm the exact manufacturing date. This example highlights the importance of understanding the specific coding system used on your mower’s serial number plate for accurate age determination.
Common Craftsman Mower Types and Manual Availability
Craftsman offers a diverse range of mowers, including walk-behind, riding, and zero-turn models. Manual availability varies significantly depending on the mower’s age and specific model number. Older models often require searching online archives or utilizing third-party manual providers, as original printed manuals may be scarce. Newer models generally have readily accessible digital manuals on the Craftsman website.
Identifying your mower type is the first step in locating the correct manual. Walk-behind mowers are the most common, followed by riding mowers. Zero-turn mowers, while popular, represent a smaller segment of the Craftsman lineup. Knowing your mower type streamlines the search process and ensures you obtain the appropriate documentation for maintenance and repair.
Where to Find Craftsman Mower Manuals Online
Locating Craftsman mower manuals online is often straightforward, but requires knowing your model number. The official Craftsman website is the primary source for digital manuals, offering a searchable database. Several third-party websites specialize in providing archived manuals for older or discontinued models. These sites often require registration or a small fee for access.
Popular resources include ManualsLib and Sears PartsDirect (as Sears previously owned Craftsman). YouTube can also be a valuable resource, with numerous videos demonstrating repairs and maintenance procedures. Always verify the manual’s compatibility with your specific model number before relying on its instructions. Careful searching using your model number will yield the most accurate results.
Craftsman Mower Parts and Replacement
Finding replacement parts for your Craftsman mower begins with identifying the correct model number. This number is essential for ensuring compatibility and ordering the right components. Sears PartsDirect remains a key resource, offering a vast catalog of Craftsman mower parts searchable by model. Other online retailers, like Amazon and eBay, also carry a wide selection.
When searching, utilize filters to narrow down results by mower type (e.g., riding mower, walk-behind). Common replacement parts include blades, belts, spark plugs, and air filters. Always double-check the part number and specifications before purchasing to avoid errors. Diagrams are often available to help visualize part locations.

Using the Model Number to Find Parts
Your Craftsman mower’s model number is the key to unlocking the correct replacement parts. Locate this number on the mower’s deck or engine – typically on a sticker or plate. Inputting this number into online parts finders, such as Sears PartsDirect, instantly filters the catalog to show only compatible components.
This eliminates guesswork and ensures you order the right blade, belt, or filter. Many parts websites also provide exploded diagrams illustrating where each part is located on your specific mower model. Utilizing the model number prevents costly mistakes and saves valuable time during repairs. Double-check the number for accuracy before initiating your search.
Filtering Parts by Mower Type
Beyond the model number, refining your parts search by mower type significantly improves accuracy. Craftsman manufactures various mowers – walk-behind, riding, zero-turn, and electric – each requiring unique components. Most online parts retailers offer filtering options allowing you to specify your mower’s category.
Selecting the correct type narrows down the results, preventing incompatible parts from appearing in your search. For instance, a riding mower blade won’t fit a walk-behind model. This feature is especially helpful if you’re unsure of the exact model number or are dealing with an older mower where the identification plate is faded. Combining mower type with the model number yields the most precise results.
Troubleshooting Common Craftsman Mower Issues
Craftsman mowers, while reliable, can experience typical issues. Addressing these promptly prevents further damage and costly repairs. Common problems include starting difficulties, often due to a dirty carburetor, old spark plug, or low oil. Blade issues, like uneven cutting or excessive vibration, usually indicate a dull or damaged blade needing replacement or sharpening.
Other frequent concerns involve belt slippage or breakage, impacting blade engagement, and deck problems causing uneven cuts. Regularly checking and maintaining these components is crucial. Before attempting repairs, always disconnect the spark plug wire for safety. Consulting your mower’s manual provides specific troubleshooting steps for your model.
Starting Problems and Solutions
Difficulty starting a Craftsman mower is a frequent issue with several potential causes. First, check the fuel level and ensure the fuel is fresh; old fuel can cause starting problems. A clogged carburetor is a common culprit, requiring cleaning or rebuilding. Inspect the spark plug – a fouled or worn plug won’t ignite the fuel; Ensure the spark plug wire is securely connected.
Low oil levels can also prevent starting, as many Craftsman mowers have a safety shut-off. Finally, verify the safety bail handle is fully engaged. If the engine turns over but doesn’t start, a weak spark or fuel delivery issue is likely. Always disconnect the spark plug before working on the fuel system.
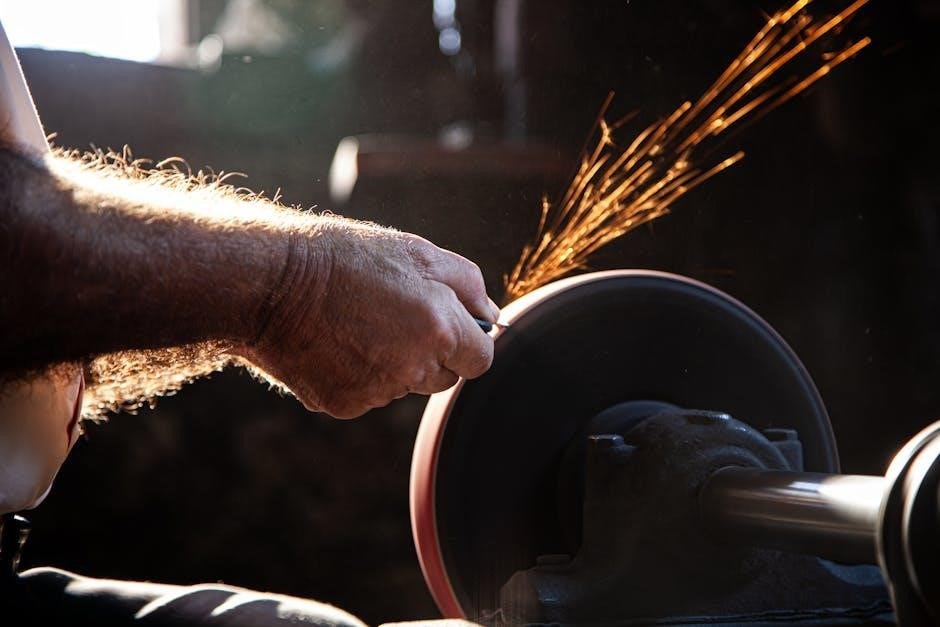
Blade Replacement Procedures
Replacing Craftsman mower blades requires careful attention to safety and proper technique. Always disconnect the spark plug wire before beginning to prevent accidental starting. Securely block the wheels to prevent movement. Use gloves and eye protection. To remove the old blade, you’ll typically need a wrench to loosen the bolt. Note the blade’s orientation for correct reinstallation.
Inspect the blade adapter for damage and replace if necessary. When installing the new blade, ensure it’s facing the correct direction – the cutting edges should point upwards when the mower is upright. Tighten the blade bolt to the manufacturer’s specified torque. Finally, double-check the blade’s security before reconnecting the spark plug and operating the mower.
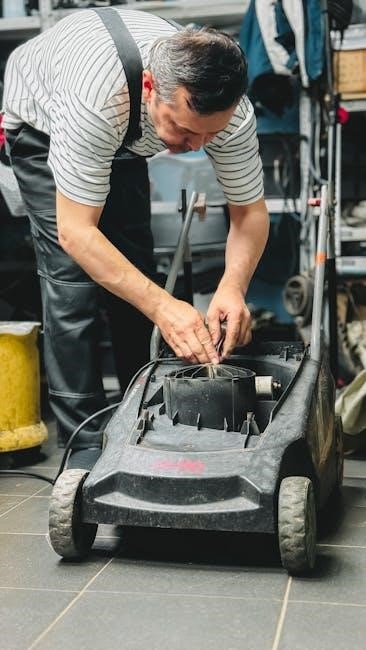
Mower Maintenance and Tune-Up
Regular maintenance extends your Craftsman mower’s life and ensures optimal performance. Begin by cleaning the mower deck thoroughly, removing accumulated grass and debris. Inspect the drive belt for wear and replace if cracked or frayed. Sharpen or replace the blades for a clean cut. Check and tighten all bolts and fasteners.
A tune-up includes changing the engine oil, replacing the spark plug, and cleaning or replacing the air filter. Inspect the fuel lines for leaks and replace if necessary. Ensure the fuel filter is clean to prevent carburetor issues. Proper lubrication of moving parts is also crucial. Following these steps will keep your mower running smoothly for years.
Understanding Craftsman Mower Safety Features
Craftsman mowers incorporate several safety features to protect operators. A crucial element is the blade brake system, designed to quickly stop the blade’s rotation when the operator releases the handle. Always ensure this system functions correctly before each use. The operator presence control (OPC) prevents the mower from running unless the operator is seated or holding the handle.
Discharge chutes and guards prevent objects from being ejected towards the operator. Never disable or bypass these safety devices. Always wear appropriate safety gear, including eye protection and sturdy footwear. Before performing any maintenance, disconnect the spark plug wire to prevent accidental starting. Familiarize yourself with all safety features detailed in your mower’s manual.
Belt Replacement Guide
Replacing a Craftsman mower belt requires careful attention to detail. First, disconnect the spark plug wire for safety. Locate the belt path, often illustrated in your mower’s manual. Remove any covers or guards obstructing access to the belt. Note the belt’s routing before removal – a photograph can be helpful!

Loosen the tensioner pulley to release the old belt. Install the new belt, ensuring it’s correctly seated in all grooves and pulleys. Re-tension the pulley and verify the belt alignment. Reinstall all covers and guards securely. Finally, reconnect the spark plug wire and test the mower’s operation. Always refer to your specific model’s manual for detailed instructions and diagrams.
Deck Adjustment Procedures
Proper deck adjustment is vital for a clean, even cut. Begin by ensuring the mower is turned off and the spark plug is disconnected. Locate the deck adjustment levers or bolts – these vary by model. Typically, raising or lowering the levers adjusts the cutting height.
Adjust all four wheels to the same height setting, ensuring the deck is level from side to side and front to back. Use a measuring tape to verify consistent height at each wheel. For uneven terrain, slightly lower the front of the deck for a better cut. Re-check the level after adjustment. Consult your mower’s manual for specific instructions and recommended height settings for different grass types.
Engine Maintenance (Oil Changes, Spark Plugs)
Regular engine maintenance extends your Craftsman mower’s life. Oil changes are crucial; consult your manual for the recommended oil type and change interval (typically every 25-50 hours). Warm the engine slightly before draining the old oil, then replace the oil filter simultaneously.
Spark plug maintenance involves checking and gapping the plug annually, or replacing it if fouled or damaged. A properly functioning spark plug ensures efficient combustion. Always disconnect the spark plug wire before performing any engine maintenance. Refer to your manual for the correct spark plug type and gap specification. Maintaining these components ensures reliable starting and optimal engine performance.
Fuel System Maintenance (Fuel Filter, Carburetor)
A clean fuel system is vital for smooth mower operation. Replace the fuel filter annually, or more frequently if using ethanol-blended fuels, to prevent clogging and ensure consistent fuel delivery. Stabilize fuel during storage to prevent degradation and gum formation.
Carburetor issues often manifest as starting problems or rough running. If the carburetor is clogged, cleaning or rebuilding may be necessary. Consult your manual for specific carburetor disassembly and cleaning instructions. Avoid using harsh chemicals that could damage carburetor components. Proper fuel system maintenance prevents performance issues and extends engine life.
Electrical System Troubleshooting
Electrical problems can range from a simple blown fuse to more complex issues with the ignition system. Always disconnect the spark plug wire before working on the electrical system to prevent accidental starting. Check the battery connections for corrosion and ensure they are tight. Inspect fuses for breaks and replace as needed with the correct amperage rating.
If the mower won’t start, test the ignition switch and solenoid. A faulty ignition coil can also cause starting problems. Use a multimeter to check for continuity in wires and components. Refer to your mower’s wiring diagram for accurate troubleshooting. Safety is paramount when dealing with electrical components.
Resources for Craftsman Mower Support
Beyond this guide, numerous resources exist for Craftsman mower support. The official Sears PartsDirect website (https://www.searspartsdirect.com/) provides manuals, parts diagrams, and troubleshooting assistance. Online forums dedicated to lawn and garden equipment, like those found on Reddit (r/lawncare) or dedicated tractor forums, offer valuable community knowledge.
YouTube channels specializing in small engine repair often feature Craftsman mower-specific tutorials. Local small engine repair shops can provide professional diagnostics and repair services. Remember to have your mower’s model and serial number readily available when seeking support, ensuring accurate assistance and parts identification.