

Welcome to our guide on cooking ALDI’s Mama Cozzis thin crust pizza! Proper techniques ensure a crispy, delicious crust and perfectly melted cheese every time. Follow these steps for pizza perfection at home.
Overview of ALDI Mama Cozzis Thin Crust Pizza
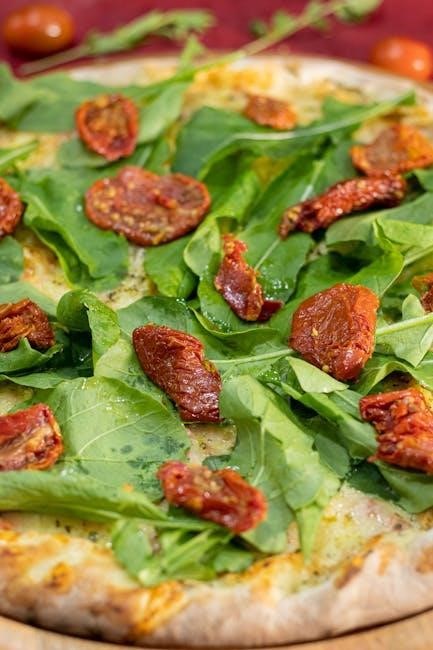
ALDI’s Mama Cozzis Thin Crust Pizza is a popular choice for pizza lovers, offering a delicate balance of crispy crust and flavorful toppings. Known for its thin, hand-stretched crust, this pizza is designed to deliver a satisfying crunch without overpowering the toppings. Available in various flavors, it caters to diverse tastes, from classic cheese to hearty meat combinations. The pizza is pre-made but designed to be finished in a home oven, ensuring a freshly baked experience. Its compact size makes it ideal for quick meals or snacks; With clear baking instructions and a focus on quality ingredients, Mama Cozzis Thin Crust Pizza is a convenient yet delicious option for pizza enthusiasts.
- Thin, hand-stretched crust for a crispy texture.
- Variety of toppings to suit different preferences.
- Pre-made for easy baking at home.
- Compact size for personal or small-group meals.
- Clear instructions for perfect results.
This pizza is a testament to ALDI’s commitment to providing affordable, high-quality products that satisfy cravings without compromising on taste.
Importance of Proper Cooking Techniques
Proper cooking techniques are essential to achieve the perfect ALDI Mama Cozzis Thin Crust Pizza. Ensuring the oven is preheated to the right temperature and using a pizza stone can make a significant difference in the crust’s crispiness. Placing the pizza directly on the oven rack or stone allows for even heat distribution, preventing sogginess. Overcrowding the pizza with toppings can lead to a softer crust, so balance is key. Additionally, letting the pizza rest for a few minutes after baking helps the cheese set and the crust retain its crispiness. Following the recommended baking time and temperature guarantees a golden-brown crust and melted, bubbly cheese. These steps ensure a delicious, restaurant-quality pizza at home.

Preparation Steps for Thin Crust Pizza
Begin by thawing the dough, preheating the oven, and preparing the crust. Lightly brush the crust with olive oil to enhance flavor and texture before adding toppings.
Thawing and Preparing the Dough
Start by thawing the dough according to package instructions or by refrigerating it overnight. Once thawed, let the dough rest at room temperature for 30 minutes to relax the gluten. Lightly flour a clean surface and gently roll out the dough to your desired thickness, ensuring even distribution for a uniform crust. If using a pizza stone, place the dough on parchment paper or a lightly floured peel to prevent sticking. Handle the dough gently to avoid tearing and maintain its shape. Proper preparation ensures a smooth, even base for your toppings, leading to a crispy and flavorful crust when baked.
Preheating the Oven and Pizza Stone
Preheating your oven and pizza stone is crucial for achieving a crispy crust. Set your oven to 425-450°F (220-230°C) and allow it to preheat for at least 30 minutes. Place the pizza stone inside the oven during preheating to ensure it reaches the same high temperature. A hot stone helps distribute heat evenly, cooking the crust from the bottom up for a crispy texture. If you don’t have a stone, preheating the oven alone is still essential. Proper preheating ensures the pizza cooks quickly and evenly, preventing a soggy crust. Let the oven and stone heat up fully before placing the pizza inside for the best results.
Lightly Brushing the Crust with Olive Oil
Lightly brushing the crust with olive oil is a simple yet essential step for enhancing flavor and texture. Using a pastry brush, gently apply a thin layer of olive oil to the edges of the thin crust pizza. This helps create a golden-brown finish and prevents the crust from drying out during baking. For extra flavor, sprinkle garlic salt over the oiled edges before adding toppings. This step ensures the crust remains crispy while adding a savory aroma to the pizza. Keep the application light to avoid making the crust greasy. Properly oiled edges will result in a deliciously crispy and flavorful base for your toppings, making the pizza more enjoyable overall. This small detail makes a big difference in achieving pizza perfection at home.
Cooking the Thin Crust Pizza
Preheat your oven to 425°F. Place the pizza on a preheated stone or directly on the rack. Bake for 10-12 minutes until the crust is golden and the cheese is bubbly.

Oven Temperature and Baking Time
For optimal results, preheat your oven to 425°F (220°C). Place the pizza directly on the oven rack or a preheated pizza stone. Bake for 10-12 minutes, or until the crust is golden brown and the cheese is melted and bubbly. If using a convection oven, reduce the temperature to 400°F (200°C) and bake for 8-10 minutes. Ensure the pizza is cooked until the center is hot and the edges are crispy. Keep an eye on it during the last few minutes to avoid overcooking. Proper temperature and timing are crucial for achieving a perfectly cooked thin crust pizza with a crispy base and flavorful toppings.
Using a Pizza Stone for Crispier Crust
A pizza stone is a game-changer for achieving a crispy, well-cooked crust. Preheat the stone in the oven at 425°F (220°C) for at least 30 minutes before baking. Place the pizza directly on the hot stone, ensuring even heat distribution. The stone absorbs moisture from the dough, creating a golden, crunchy crust. For convection ovens, reduce the temperature slightly and bake for 8-10 minutes. The stone’s surface ensures the crust cooks evenly, avoiding sogginess. This method enhances the flavor and texture, delivering a restaurant-quality pizza at home. Always preheat the stone thoroughly to maximize its effectiveness and achieve the perfect crispiness for your ALDI thin crust pizza.
Placing the Pizza Directly on the Oven Rack
Placing the pizza directly on the oven rack is a key step for achieving a crispy crust. Preheat your oven to 425°F (220°C) and ensure the rack is in the center position. Carefully remove the pizza from its packaging and place it directly on the rack. This method allows air to circulate evenly around the crust, promoting crispiness and preventing sogginess. Bake for 12-15 minutes, or until the cheese is melted and bubbly, and the crust is golden brown. For easier cleanup, you can line the rack with parchment paper. Avoid using the cardboard tray, as it can interfere with cooking. This direct placement ensures your ALDI thin crust pizza cooks evenly and delivers a delicious, restaurant-quality result at home.
Essential Tips for the Best Results
Let the dough rest before baking for optimal texture. Drizzle olive oil on crust edges for crispiness and sprinkle garlic salt for enhanced flavor and aroma.
Allowing the Dough to Rest Before Baking
Allowing the dough to rest before baking is crucial for achieving the perfect thin crust. This step ensures the yeast activates, making the dough rise slightly and creating a lighter texture. Remove the dough from the refrigerator about an hour before baking to let it warm up and relax. If using frozen dough, thaw it first and let it rest for 30 minutes to an hour. A well-rested dough will be easier to shape and less likely to shrink during baking. Skipping this step can lead to a dense crust. Cover the dough with plastic wrap or a damp cloth to prevent drying out. Proper resting ensures a crispy, evenly cooked crust with a delicious flavor.
Drizzling Olive Oil on the Crust Edges
Drizzling olive oil on the crust edges enhances the flavor and texture of your thin crust pizza. Lightly brush the edges with a small amount of olive oil before baking to create a golden, crispy crust. This step adds a subtle richness and prevents the crust from drying out. For extra flavor, sprinkle garlic salt on the oiled edges before baking. Be careful not to overdo it, as too much oil can make the crust soggy. This simple technique elevates the pizza’s overall taste and ensures a delicious, professional-style finish. It’s a small detail that makes a big difference in achieving pizza perfection at home.
Sprinkling Garlic Salt for Enhanced Flavor
Sprinkling garlic salt on your thin crust pizza is a simple yet impactful step to elevate its flavor. After lightly brushing the crust edges with olive oil, sprinkle a pinch of garlic salt evenly. This enhances the savory notes and adds a subtle aromatic depth. Be careful not to overseason, as garlic salt can overpower the other flavors. The combination of olive oil and garlic salt creates a harmonious balance, ensuring the crust is both crispy and flavorful. This step is especially recommended for those who enjoy a savory, slightly aromatic crust. It’s a small addition that makes a big difference, ensuring your pizza tastes professional and delicious. Make it a habit for every bake to achieve consistent, mouthwatering results every time.
Post-Baking Steps
After baking, let the pizza rest for a few minutes to ensure the cheese sets and the crust retains crispiness. Ensure the cheese is fully melted and bubbly for optimal flavor. Always check the internal temperature reaches 165°F for food safety. Letting it stand briefly before serving helps preserve the texture and prevents sogginess. This step is crucial for achieving the perfect balance of texture and flavor in your thin crust pizza.
Letting the Pizza Rest Before Serving
Allowing the pizza to rest for a few minutes after baking is essential for achieving the perfect texture. This step ensures the cheese sets properly and prevents sogginess. Letting it stand for 2-5 minutes allows the juices to redistribute, making each bite flavorful and consistent. The crust will retain its crispiness, while the toppings stay evenly distributed. Resting also helps prevent the cheese from stretching excessively when sliced. For food safety, ensure the internal temperature reaches 165°F before serving. This brief waiting period enhances the overall dining experience, ensuring a deliciously balanced and visually appealing pizza. Patience here guarantees a superior texture and flavor profile that elevates your homemade pizza to restaurant quality.

Ensuring the Cheese is Melted and Bubbly
To achieve perfectly melted and bubbly cheese, bake the pizza at the recommended temperature of 400-425°F for 10-16 minutes. The cheese should be fully melted and slightly bubbly in the center. Avoid opening the oven too early, as this can cause the cheese to deflate. If using a pizza stone, it helps distribute heat evenly, ensuring consistent melting. For an extra burst of flavor, drizzle olive oil over the cheese before baking. Some recipes suggest sprinkling garlic salt for enhanced flavor. Ensure the internal temperature reaches 165°F for food safety. Proper melting creates a creamy, golden layer that complements the crispy crust. This step is crucial for a satisfying, cheesy pizza experience that’s sure to please!
Perfectly cooking ALDI’s thin crust pizza requires attention to temperature, timing, and technique. By following these steps, you’ll achieve a crispy crust and bubbly, melted cheese. Enjoy your homemade pizza masterpiece with ease and satisfaction!
Final Thoughts on Achieving Pizza Perfection
With the right techniques and attention to detail, you can consistently achieve a deliciously crispy and flavorful thin crust pizza at home. Preheating your oven to the correct temperature and using a pizza stone are essential for a perfectly cooked crust. Lightly brushing the dough with olive oil and sprinkling garlic salt enhances the flavor, while allowing the pizza to rest before serving ensures the cheese sets properly. Don’t overload the pizza with toppings, as this can make the crust soggy. By following these steps and tips, you’ll enjoy a homemade pizza that rivals your favorite restaurant. Remember, practice makes perfect, so experiment with different toppings and techniques to find your ideal combination. Happy cooking!